
Composition Technique - Viewpoint - Second Part

Have you used viewpoint?
This blog relates to using viewpoint in your photography & this is the 2nd of two blogs on this composition technique
Have you used the viewpoint when taking a photograph?

What is the viewpoint?
The composition called viewpoint is where you consider your position to the view or objects that you are taking a photograph of. Here are a few options to consider when relating to the viewpoint:
Birdseye
High Angle
Eye-level Angle
Low Angle
Do you think by looking at the images to the right, that you have possibly used some of these angles when taking your photographs?
New Blog
This is the 2nd part of my Viewpoint blog entry, have you read the 1st one?
If not, please follow this link and read about using Birdseye Viewpoint
This blog is all about when to use these types of angles in your photography: High angle, Low angle and eye-level angle.
High angle

A high-angle shot is a cinematic technique where the camera looks down on the subject from a high angle and the point of focus often gets "swallowed up". High-angle shots can make the subject seem vulnerable or powerless when applied with the correct mood, setting, and effects.
Here is a good example of this form of photography.

Here are some useful websites to look at, that link to angle viewpoint
https://www.studiobinder.com/blog/high-angle-shot-camera-movement-angle/
https://nofilmschool.com/high-angle-shot-definition-examples
The process of using a high angle in your photography has been mainly used within filming and video angles. You can try this effect with a drone, portraits and possibly street photography. On the opposite end of high is low, so you can also attempt to shoot images from a low angle.
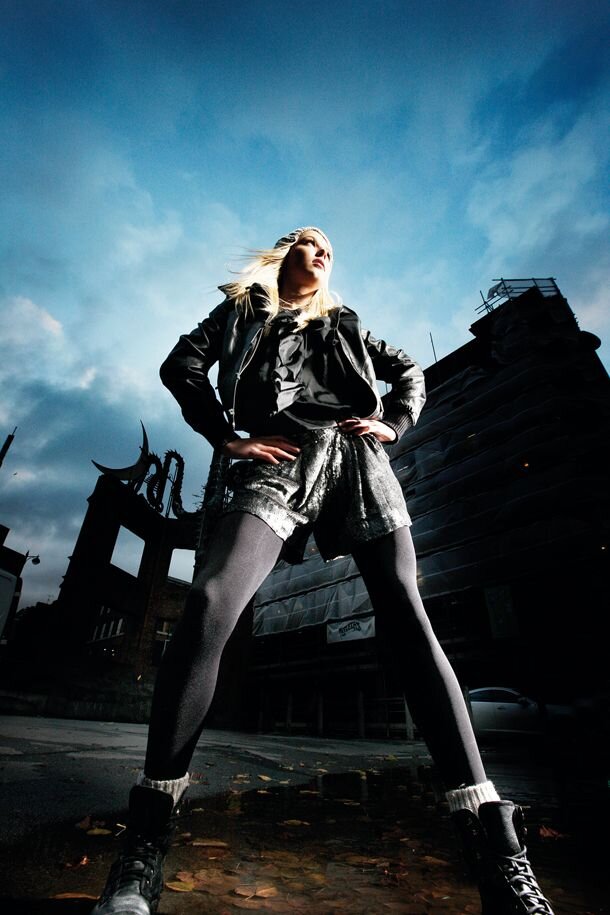
Low angle
Watch this video and try some of the angles mentioned for your angle photography. The best thing to consider per angle is the perspective you will be forming depending on your angle. A set angle for some subjects will cause the object to be deformed, so keep an eye on the perspective.
In portrait photography, low-angled photography can elongate a model’s body, which makes them seem thinner or will make them taller than in reality. Have a look at these two examples:

These two images both look great at this angle, but just be aware that once you decide to zoom in on a person’s face, the images will look like you are looking up their nose and this is an unflattering look.
Another photography genre that this angle perspective is good for, is either street photography or landscape.
With landscape, images make sure you are considering the effects of lens distortion, which are: barrel, pincushion & moustache. This can happen once you move to use a wide-angle lens for your landscape photographs.

Here are some visuals that relate to the three lens distortions mentioned above and I have uploaded a Photoshop video to watch so that you can correct these issues in post-production if they occur.
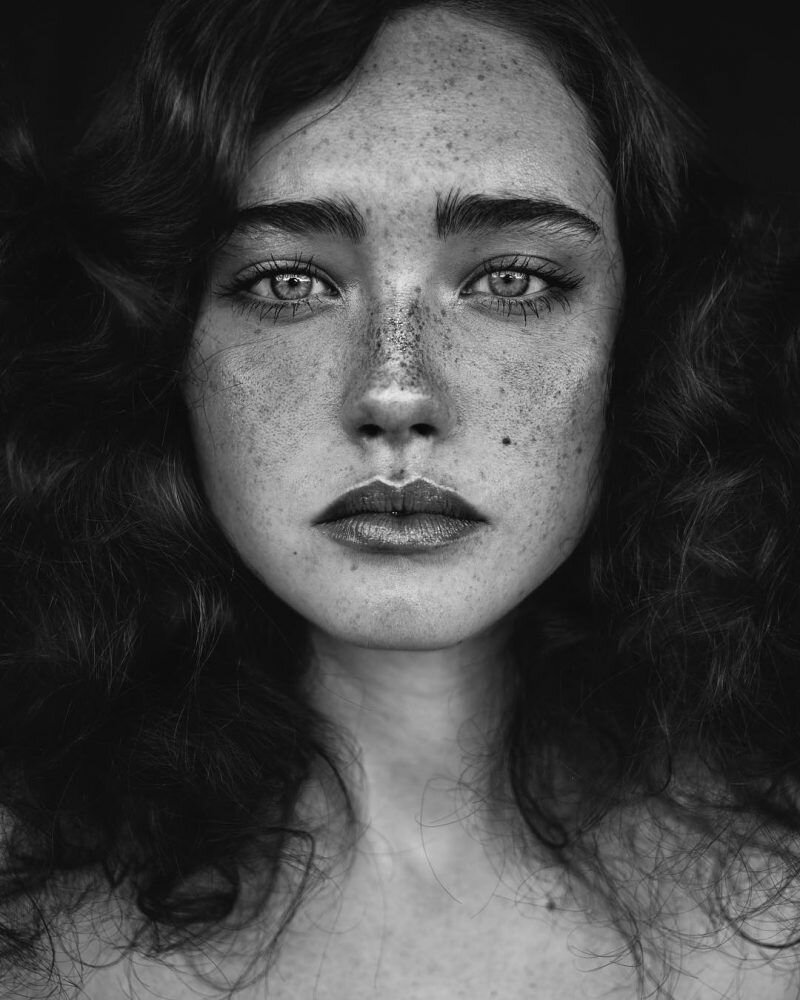
EYE-LEVEL ANGLE
Okay, so I have explained the different elements for both high & low-angle photography. Most of us always shoot at eye level
The eye-level angle is an angle of view when the camera is held & shot at the same eye level as the model, object or animal that you are photographing. This forms a flat angle between you as the photographer and the subject you are photographing. This is also a good angle to form a connection with what you are photographing. If you are shooting animals or humans, eye contact is a great way to become connected and you can begin to work on making the subject comfortable with your photographing them.
Here are some examples of eye-level viewpoints and I have selected an image for portrait, landscape and animal photography.


Summary of "Composition Technique - Viewpoint (Part 2)"
This blog is the second part of a series focused on the Viewpoint composition technique in photography. It explores how the photographer’s position relative to the subject can dramatically affect the image’s impact. The blog covers three key angles:
High Angle:
The camera looks down on the subject, often making them appear vulnerable or small.
Common in cinematography, but also effective in drone photography, portraits, and street photography.
Useful links are provided for further exploration.
Low Angle:
The camera shoots from below the subject, creating a sense of power or elongation (especially in portrait photography).
Great for street and landscape photography, but watch for lens distortions like barrel, pincushion, and moustache effects.
Tips are included for correcting distortions in post-production.
Eye-Level Angle:
A neutral, natural perspective where the camera is level with the subject’s eyes.
Ideal for creating connection and intimacy, especially in portraits, wildlife, and landscape photography.
This blog should encourage you as a photographer to experiment with these angles to add depth, emotion, and drama to their images. It also highlights how these viewpoints are commonly used in film and TV for storytelling.
ARE YOU Ready to Master the Art of Viewpoint?
Reading about composition techniques is just the start, practicing them with expert guidance can truly elevate your photography. If you’re eager to refine your skills in using high angles, low angles, eye-level shots, and more, why not book a 1:1 photography tutoring session with me?
Together, we’ll dive deep into how to choose the perfect viewpoint to create powerful, dynamic images. You’ll receive personalized feedback, hands-on tips, and tailored advice to help you grow as a photographer.
Book your 1:1 session today and start transforming the way you see and capture, the world!
Let’s bring your creative vision to life, one shot at a time!